Thursday, June 25, 2015

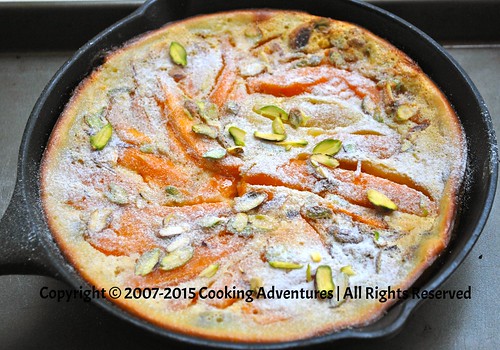
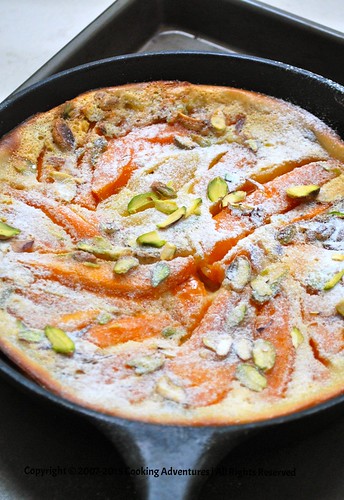
Mango Ginger Clafoutis

DSC_0046

We are having a great mango season here. First it was the king of mangoes, Alphonso, that we savored during our vacation with my parents and in laws. Growing up we always ate Alphonso….I mean buying any other variety back then was crime!! Having moved to Gujarat, we didn't quite get the awesome Alphonso mangoes that we had access to in Pune or Mumbai. We bought some locally available Kesar variety, albeit, with some frown. It took us a while to accept the taste but boy are we in love with it or what!! They are oh so good!!! In fact the best variety for baking, I think! Their natural sweetness means less added white sugar. They are juicy yet not the mushy types which gives the perfect moistness to cakes. What more can you ask for?

We started with some homemade mango ice cream, followed by mango panna cotta, then a super moist and delicious mango raisin tea bread and now we are trying hard to keep our forks off of this mango ginger clafoutis as I am quickly trying to take pictures!!

I loved making this clafoutis, it was a breeze, with ingredients readily available in the kitchen! That I got to use my favorite cast iron skillet to bake the clafoutis in was like the icing on the cake!!
DSC_0049

Ingredients:

1 1/4 cup whole milk
1/2 cup sugar, divided
1/2 cup all purpose flour
2 medium eggs
1/4 tsp ginger root powder
1/4 cup pistachios, sliced
1 large OR 2 medium ripe mangoes, cubed or sliced
Powered sugar for dusting

Method:

Preheat oven to 175 deg C. Butter an 8 inch cast iron skillet and set aside.

In a blender process,  milk, 1/4 cup sugar, flour, eggs and ginger root powder until well combined.

Pour a thin layer of this batter in the cast iron skillet and bake for about 5-7 min until set. Remove from the oven.

Arrange the fruit on the batter, sprinkle with remaining 1/4 cup sugar and nuts, pour the rest of the batter on top of the fruit and nuts and bake for an additional 45 to 50 min until set and knife inserted in the center comes out clean.

Dust powdered sugar on the top and serve warm with lightly sweetened cream or ice cream.

Notes:

1. You can bake this clafoutis in any regular baking tin. Just keep in mind the size of the tin that you are using. Adjust baking time accordingly.
2. Substitute mangoes with any stone fruit or berries.
3. I feel pistachios pair very well with mangoes but almonds or even cashews would taste great.
4. The quantity of ginger root powder that I have added gives the clafoutis a very subtle ginger flavor. You can add up to 1/2 tsp ginger root powder for a stronger ginger flavor.

Monday, March 2, 2015

Mixed Whole Grain Crackers


Easy to make, healthy for your body and a recipe that uses ingredients that are easily found in any kitchen, these crackers are surely getting added to our repertoire of home made snack supplies. The spices used in here can be easily substituted with what your family prefers. I think any nut meal can also go in place of one of the flours. 

These days, "Mama, I am hungry!" echos through the house at any hour of the day. The five year old is off school for a week due to swine flu outbreak. Any time I ask her to do something, she says "Mama, I am hungry!". She loves gulping down gallons of milk and the minute she has a glass of it, claims to have gotten rid of some imaginary body ache. Of course, it goes without saying that she never feels hungry if I let her watch TV!! LOL…the other day, she said I don't feed her enough and so her knee hurts! The same day my husband said, "Spare her, don't stuff her like a twenty five year old, she is only five!!" What a day full of such comedy conversations!! After a pretty rough patch, I am finally loving being a SAHM. Would be missing so much of innocent humor in my day, had I been unlucky enough to sit in front of the computer at work all day long! 


So after one such "I am hungry" episode, I set out to make these crunchy crackers. Prep done half hour before the kids went down for a nap, these crackers were a breeze!! It took me a bit long to complete the task as I own only one cookie sheet. But if you have more than one and can fit them in your oven, then in thirty minutes you can sit down to savor these delicious crackers!! I did plan on a creamy veggie dip originally but that never happened!! Just blame the younger one, he woke up earlier than expected!!!


Mixed Whole Grain Crackers

Ingredients:

2/3 cup whole wheat flour
2/3 cup amaranth flour
2/3 cup oats
1 TBS kasoori methi, crushed between the palms of your hands
1/2 tsp freshly cracked black pepper
1 tsp salt
3 TBS oil (I used filtered groundnut oil but olive, sunflower, canola oil would do as well)
Water, as needed
1 TBS Onion seeds or sesame seeds (optional)

Method:

In a mixing bowl, mix all the ingredients up to salt. Add oil and gently mix it with the dry ingredients. Now slowly add water as needed to form a soft yet firm dough.

Let the dough rest for 15 minutes. Then divide into four equal parts. With the help of a rolling pin, roll each part in to a thin disc (about 1-2mm thickness). Sprinkle some onion or sesame seeds on top and then gently roll again to firmly press the seeds on the disc. Cut in to 12 equal parts with the help of a knife.

Preheat oven to 150 Deg C. Till the oven pre heats, arrange the cut crackers on a cookie sheet lined with parchment paper.

Bake for 10 min until golden brown. Remove from oven, flip the crackers and bake for another 5 minutes until crisp. Leave on the cookie sheet for another 5 min, then transfer to cooling racks to cool completely. Once cooled, immediately transfer to an air tight container.

Makes about 4 dozen crackers.

Serving:

Serve with your favorite dip. Should stay crisp in an air tight container for about 4-5 days, if they last that long!

Friday, February 27, 2015

Whole Grain Apple Cranberry Loaf Bread


Eight years back when I started this blog, I had nothing to offer in the baking department. I had in the past goofed up several cake bakes by substituting baking soda with baking powder, reducing the flour called out in the recipes as per my wish, adding liquid beyond imagination. You get it, right? I didn't know a thing about baking!

Slowly things (read "luck") changed. Getting inspired by professionals like Ina Garten, Martha Stewart and a few fellow bloggers, I learnt a few things about baking! Number one being….."stick to the recipe". Yet, the imprudent baker that I was, I tried a banana nut bread with some substitutions in the original recipe, that came out of the oven fabulous…. not once or twice but several times!!! A few more attempts with other bakes came out well. The baker in me was on fire but little did I know that I was only on my way to mess up a few more cakes!!! Luck had changed again and I parted ways with baking.

A few years after our big move back to India, I got a small Morphy Richards oven to be able to make veggie bakes, enchiladas, pasta etc. I was pretty happy with my oven. I decided to try my luck with my very trusted banana nut bread!! Voila! It came out great yet again! A few other cakes were tested and they tasted great…..then came the call by Kitchen Aid asking home bakers to send their entires to Pro baker 2015!! Suddenly a burst of energy rose inside me…..it was time to stop trying recipes and instead create some!! Too early to be so confident but I had some kind of gut feeling about getting this one right. 

This whole grain apple cranberry bread needs a little introduction! An idea that captured my mind for a whole month now, a recipe that was developed over a week with a lot of reading on quick breads. I agree that the recipe is not very uncommon but when you develop something on your own with a lot of thinking going behind the recipe, it becomes very special to you!! And it becomes even more special  when the risen cake does not collapse in front of your eyes, no power cuts during baking, both kids asleep during the entire prep, bake and cooling process (yay!). Was that luck or what?? My sudden impulsive on the spot decision to reduce an egg and add yogurt instead worked very well too. I think it gave the bread a nice crumb. The sweet local apples pair beautifully with the slightly tart cranberries. Walnuts provide a nice crunch to this moist crumbly bread. The addition of whole wheat convinces you to reach for guilt free second servings!! It tasted even better the next day as the flavors matured. And I was on cloud nine when my 5 year old girl said, "Mama, when will you make this bread again?"

This is my entry for Kitchen Aid's Probaker 2015! Come participate and have fun!


Ingredients:

Whole Grain Apple Cranberry loaf bread-
1 cup whole wheat flour
3/4 cup all purpose flour
2 tsp baking powder
1/2 cup unsalted butter, room temperature
3/4 cup demerara sugar, firmly packed
1 egg, room temperature
1/2 tsp vanilla bean powder OR 1 tsp vanilla extract
1/2 cup apple sauce (recipe follows)
1/4 cup homemade yogurt, room temperature
2 medium sized apples cored, peeled and diced
1/2 cup dried cranberries, coarsely chopped (I left a few whole)
1/4 cup chopped walnuts

Glaze-
1/4 cup powdered sugar
1-2 tsp milk

Method:

Grease and flour a 8 1/2 X 4 1/2 X 2 3/4 loaf pan. Line bottom with parchment. Preheat oven to 175 deg C.

Sift wheat flour, flour, baking powder thrice. Reserve.

With an electric beater cream butter and sugar until light and fluffy. Add egg and mix well. Beat in vanilla bean powder followed by apple sauce and then the yogurt.

Now add the reserved flour mixture and with the beater on low, mix just until incorporated. Do not over beat at this point.

Fold in the diced apples, cranberries and walnuts. The batter will be quite thick!

Pour batter into the prepared loaf pan and even out the top. Keep the pan on a cookie sheet and bake in the preheated oven for 25 minutes. After 25 minutes remove the loaf pan and place on to another empty loaf pan of the same size and bake for another 25 minutes or until tester comes out clean. Alternately you can bake at a lower temperature (165 Deg C) until the tester comes out clean.

Let the bread cool in the pan for about 10 minutes, then remove on to cooling rack to cool completely before slicing.

Mix the ingredients for the glaze and pour on top of the loaf bread. Let some glaze drip on the sides.

Serving:

Cut think slices and enjoy with your morning tea or coffee. The flavors mature the next day and the bread tasted even better making this a perfect make ahead dish for a brunch party.

Notes:
*If not using the glaze, increase the sugar in the recipe to 1 cup.
*The bread stays well at room temperature for 1-2 days only. If yours lasts longer then store in the refrigerator.
*I think you can easily substitute the fresh fruit and dry fruits in the recipe with other ingredients of your choice. Let your imagination run wild!
*You could add a pinch of salt to the batter. I didn't.

Recipe for Apple Sauce-
2 medium apples, cored, peeled and diced
1 inch stick of cinnamon
4 cloves
1 TBS organic brown sugar
2 TBS water, if needed
1/4 to 1/2 tsp lemon juice

Method:
Put all the ingredients in a sauce pan and cook until tender and mushy. You can add a couple of tablespoons of water if needed. Fish out the spices and then mash with a potato masher or puree in your blender. Makes about 1 cup. Store any left overs in the fridge.


Thursday, June 13, 2013

Herbed Wild Rice with Goan Paneer Xacuti Curry


We recently visited Goa with some of our very close friends. The balmy beaches, the soft sand, the tall coconut trees and the twinkly night skies made the trip relaxing. We didn't get to explore much of Goan cuisine during our stay but we found enough time to browse through spices at a local market. One such spice mix that caught my eye was "Xacuti masala".

Ever since we got back, I have been wanting to make a curry with the Xacuti masala mix that we brought back with us. It all came along beautifully in this paneer curry with coconut milk as its base!! We found the flavors subtle and the spice mix does not overpower any other ingredients in the recipe.  If you want to make your own "Xacuti masala", there are plenty of recipes on the web or just ask a Goan!! I found that the nuttiness of the wild rice compliments the creamy texture of the curry, but plain rice will go along well too!

Ingredients:

For the Herbed Wild Rice-

1 cup uncooked wild rice (You can use basmati rice)
1/4 cup finely chopped raw mango
4 cloves of peeled garlic, chopped finely
Handful of mint leaves, roughly chopped
Handful of cilantro, roughly chopped
Sliced lemon
1 TBS butter
Salt to taste

For the Goan Paneer Curry-

1 TBS olive oil
1 TBS xacuti masala
1 bay leaf
1 cup coconut milk
1 pod green cardamon
1/4 tsp turmeric
1/4 tsp red chilli powder
1/2 tsp sugar
1/2 cup water
1 cup paneer, cubed (You can use tofu)
Salt to taste

Method:

Herbed Wild Rice-
Cook wild rice as per the instructions on the box. (I combined 1 cup rice, 2 cups water, 1 TBS butter, salt as per taste and bring it to a rolling boil, cover and simmer for 45 minutes)

Mix raw mango, garlic, mint, cilantro and lemon with the cooked rice just before serving.

Goan Paneer Curry-
Heat olive oil in a sauce pan. Add xacuti masala and bay leaf.

Then add the coconut milk and mix well. Add cardamon, turmeric, chill powder, sugar and water. Bring it to a slow simmer. Add salt as per taste.

Now add the cubed paneer and mix well. Simmer to about 5 minutes. Add more salt if needed.

Serving:

Serve the wild rice and curry, piping hot! You could also serve the curry with any bread/roti of your choice.


Friday, November 11, 2011

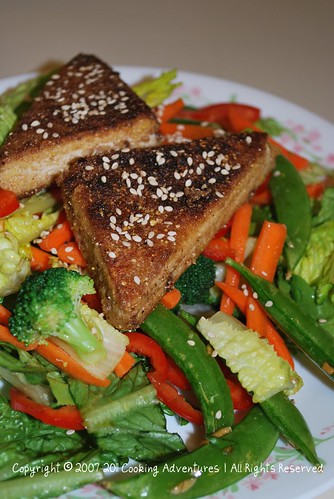
Asian Salad with Crispy Tofu


Asian salad with crispy tofu


We enjoyed this refreshing salad for a quick dinner last week. What I particularly enjoyed about this salad, was that everything can be prepared in advance and just tossed together before serving. The quantity below is just a rough guide, use your common sense, gut feeling and adjust for your taste.


Adapted from http://thematisametaphor.wordpress.com/2010/06/15/
Ingredients:
Romaine Lettuce
Half a red pepper, sliced
1/2 cup shredded carrots
Handful of sugar snap peas
1 cup broccoli florets, blanched in boiling water for about 2-3 min until just tender
1 TBS sesame seeds, toasted for topping

Toss everything except the sesame seeds and keep aside

For the crispy tofu
Extra firm tofu, quantity as needed, cut in triangles
1 cup water
1 TBS soy sauce
1 bay leaf
Whole wheat flour
Corn meal
Olive oil
Sesame oil

Bring the water, soy sauce and bay leaf to a boil, add the cut tofu and simmer for 20 minutes. Remove the tofu and let cool. Dredge the tofu in a mixture of wheat flour and corn meal. Heat some olive oil and sear the tofu until brown/caramelized on both sides. Toss some sesame oil on top.


NOTE: Tofu can be prepared up to 8 hours in advance. Warm the tofu again on a pan before serving if prepared in advance.


Dressing:
~2 TBS olive oil
1 tsp sesame oil
1 TBS soy sauce
Dash of sriracha sauce
1 clove of garlic, grated or minced
1 tsp grated ginger


Whisk everything together and toss with the salad just before serving

Method:

Toss the dressing with the salad just before serving. Arrange the warm tofu on top. Drizzle some toasted sesame seeds on top for a great garnish.

Thursday, September 22, 2011

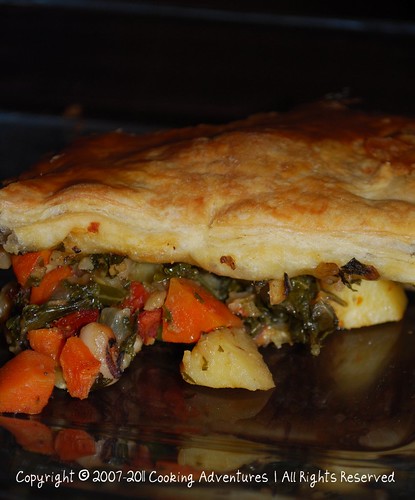
Healthy Rustic Potpie

Not enough time to write a post today, but here is the recipe for the potpie made for dinner today! It was a great success and both my adult kid and two year old kid loved it...

Rustic potpie


Rustic Potpie
Serves 3-4 with a side salad


Ingredients:

2 TBS extra virgin olive oil
2 sausage or veggie sausage patties
2-3 cloves of garlic, finely minced
2 TBS chopped sun dried tomatoes in oil
1 medium sized sweet onion, chopped
4 spring onion, chopped, white and green
2 medium sized carrots, cubed
2 medium sized potatoes, cubed
1/2 cup frozen sweet peas, thawed
1/2 cup frozen corn, thawed
1 bunch kale, washed and finely chopped
Pinch of grated nutmeg
1-2 TBS cumin coriander powder
1 cup black eyed peas cooked OR 1 can black eyed peas, drained
1/2 cup cooked brown rice
Salt as per taste
1 sheet frozen puff pastry, thawed
1 egg, mixed with 1 TBS water, to use as an egg wash

Method:

In a large sauté pan, cook the patties on both sides until brown. Remove the patties and let them rest.

Then saute the garlic, sun dried tomatoes, sweet onions and spring onions over medium heat until the sweet onions are translucent.

Add carrots, potatoes, peas and corn, stir and cover. Continue stirring occasionally until cooked.

Add kale, stir and cook without covering for about 5-7 minutes. Add the nutmeg, cumin coriander powder and stir well.

Now add the black eyed peas, rice and sausage patties (cubed) and salt. Cover and cook for about 5 minutes, adding about 1/4 cup water if too dry.

Spread this mixture evenly in a 9X13 greased oven proof dish.

Sprinkle some flour on the counter and roll a sheet of puff pastry to fit the 9X13 dish. Cover the mixture with the sheet. Apply the egg wash with a pastry brush on to the pastry sheet. Sprinkle some salt on top if desired.

Bake in a 325 deg oven for about 20-25 min OR until the puff pastry is golden brown.

Serve:

Serve hot out of the oven.

Note: 
Can me made in to 4 individual portions.


Thursday, March 3, 2011

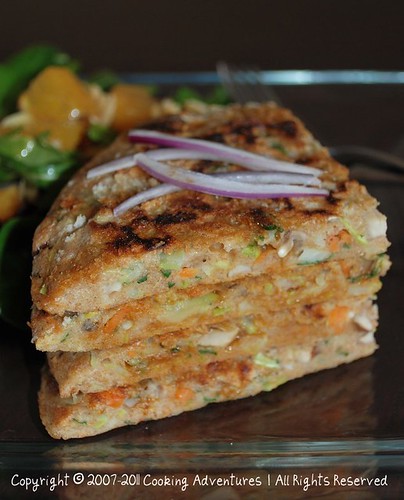
Okonomiyaki - Japanese Savory Pancakes

Okonomiyaki- Japanese Savory Pancakes

I was browsing for some recipes on the internet when I came across this word "Okonomiyaki" accidentally. I had never heard of Okonomiyaki, a Japanese savory pancake. It has several ingredients in it. The recipes that I stumbled upon looked easy and healthy. The word okonomi means "what you want" or "what you like". It happens to be a dish which is prepared right in front of you using your choice of ingredients(meat, vegetables etc.) It seemed like this one was going to give me plenty of opportunities to experiment with my ideas and play with a lot of ingredients!

The recipe that follows is an outcome of those ideas. As always, I have made quite a few modifications to the classic recipe. The batter is made of whole wheat flour with ground cumin, cloves and black peppers, making it more nutritious. Instead of serving it whole as any usual pancake, I cut it in quarters and stacked them up with a dab of soy sauce on each quarter. The panko gives the pancake a great crunch while the soy sauce gives it the perfect salty bite. We ate these delicious pancakes with a side of citrus salad.

Okonomiyaki - Japanese Savory Pancakes
Serves 2 with a side salad or soup

Ingredients:

1 cup whole wheat flour
1 1/2 to 2 cups water
1/2 tsp cumin, 1 clove and 4 black peppers, finely ground
1 egg, lightly beaten
1/4 head of a cabbage, thinly sliced
1/4 cup baby bella mushrooms, roughly chopped
1 medium carrot, peeled and grated
4 TBS panko (Japanese bread crumbs, can substitute regular bread crumbs)
1-2 TBS soy sauce
2-3 TBS extra virgin olive oil
Salt as per taste

Method:

Mix the flour and spices and add water as required to make a pancake-like batter.

Add the egg, vegetables, salt and stir.

Heat a medium sized (about 8 inch) skillet. Add 1 TBS olive oil. Pour half the batter in the pan and cook for 2 minutes. Sprinkle 2 TBS of panko on top. Cook for 8 to 12 minutes per side adding more oil if needed. NOTE: The panko topping is only on one side.

Use the same procedure for the remaining of the batter.

Serving:

Cut each pancake in quarters and stack on top of each other (panko topped side on top) with a dab of soy sauce on each quarter. Enjoy with a soup or salad.

Monday, February 7, 2011

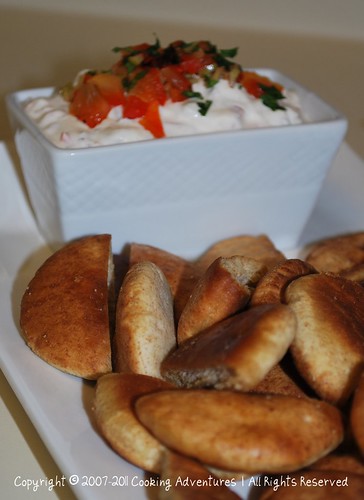
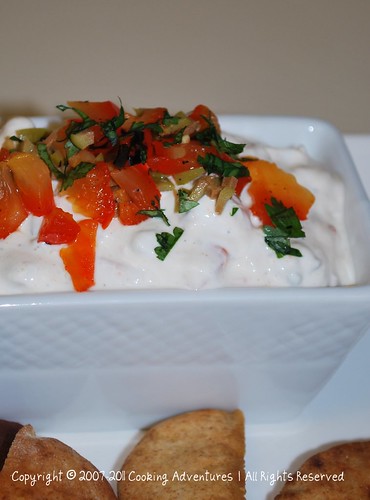
Baked Mini Pita Chips with Roasted Red Pepper & Greek Olive Dip

Baked Mini Pita Chips_By Poonam Phatak

When it comes to nutritious snacking, I am in deep trouble every time. I mean there is always the fruit, nuts and homemade cracker and cheese option available. But what I am trying to say is that at a party or when hanging out with friends, snacking items such as chips, sauces and dips mostly come out of a store bought box. Now those who know me well, know that I have some serious friction with "packaged products" where the ingredients listed don't seem to have any relationship with the product itself. Read this to understand exactly what I mean.

Not that I don't eat such treats at all but I am forever trying to find some easy, low sodium and home made munching treats to cater my nutritious needs. These baked pita chips and dip provide a quick and stress free alternative to the typical off-the-rack nibbles. The dip is very versatile too. It can also be used as a salad dressing or as a sauce or spread.

This is also my entry to February's Monthly Mingle. Astrid of Paulchens FoodBlog is asking us to make Small Bites: Soul Food for Loved Ones. These small bites will look very elegant if served whole with a tiny dollop of the dip on top sprinkled with some finely chopped cilantro or parsley. Since, we ate them during the super bowl, they were served "sports style" as seen in the picture. But no matter how you serve them up, I will guarantee the taste! Thanks, Meeta for your wonderful event!

Roasted Red Pepper and Greek Olive Dip with Curry Powder_By Poonam Phatak

Baked Mini Pita Chips with Roasted Red Pepper & Greek Olive Dip
Serves 4

Baked Mini Pita Chips-

Ingredients:
About 20-25 mini pita bread*, halved
2-3 TBS olive oil

Method:
Toss the halved pita bread liberally with the olive oil on a baking sheet. Bake in a 450 deg F oven for about 10-15 minutes. Serve immediately with the dip.

Roasted Red Pepper & Greek Olive Dip

Ingredients:
1 small or half a medium red bell pepper
3-4 greek olives, chopped finely
1/4 to 1/2 tsp curry powder
Salt
1 cup of sour cream*

Method:
Roast the red pepper on a gas stove or outdoor grill until charred. Place in a glass bowl and cover with plastic wrap for about 5-7 minutes. Remove the plastic wrap and peel the charred skin of the pepper. Chop finely.

Mix the finely chopped pepper, olives, curry powder and salt as needed with the sour cream. OR coarsely puree the pepper, olives, curry powder and sour cream in a food processor. Serve with the warm pita chips.

Notes:
*Substitute sour cream with thick greek yogurt and a squeeze of lemon for a lighter option.

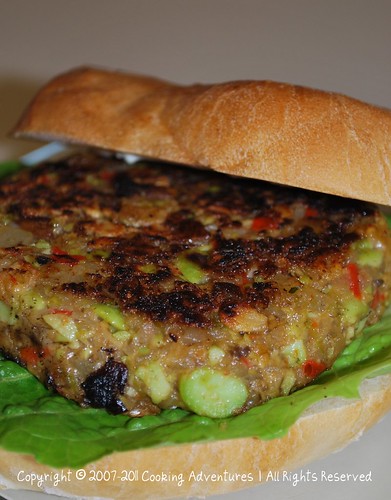
Edamame and Mushroom Burgers with Ginger Lime Mayo

Edamame and Mushroom Burgers with Ginger Lime Mayo_By Poonam Phatak

The past weekend was special! I went with my girl friends for a ladies night out on Friday. After a longest time we were able to relax with a few cocktails, clear some brain space of inessential gossip and make room for more. We drank,
laughed hard and
clearly had too much fun......so much that the lady at the next table asked us if we were having a bachelorette party! Now that was quite a compliment because, except for one, all of us have kids ranging from a twenty month old to a ten year old. The evening ended on a high note with all of us making plans for yet another ladies (or should I say girls?) night out!

This much needed break from my recent mundane activities brought back so much energy in me that by Sunday afternoon I had actually been able to spend time with Myra and hubby before finishing my weekend chores to watch the super bowl. And oh, how can I forget Saturday? We (including my 20 month old) binged at a local Chinese buffet......certainly not typical for my family!!

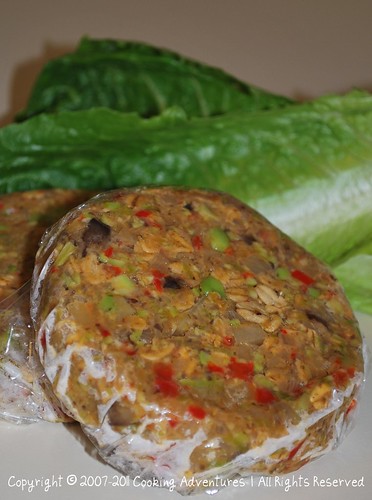
We had a good time watching the super bowl with these edamame and mushroom patties which I
managed to prepare and freeze before the big kick off.
The soy sauce gave it a nice salty bite, while the ginger lime mayo gave it the right amount of tartness.

Edamame and Mushroom Burger Patty_By Poonam Phatak

Ingredients:
Makes 4 patties

1 cup frozen edamame beans*
1/4 cup extra virgin olive oil
1 shallot, finely chopped
1 clove of garlic, finely chopped
1/2 cup finely chopped red bell pepper
1 cup finely chopped potato
1 cup baby bella mushrooms
2 TBS soy sauce
1 tsp Sriracha sauce or any hot sauce (add more if you like it extra hot)
1/4 cup old fashioned rolled oats**
Salt to taste

For the Ginger-Lime Mayo
Mix 1/2 cup good quality mayo, 1 tsp freshly grated ginger, zest and juice of a lime in a bowl, add salt, mix and set aside

Method:

Bring 2 cups of water to a boil, add salt, stir and add the edamame. Cook until al dente (about 8 minutes). Drain and coarsely chop the edamame on the cutting board with a knife or pulse in a food processor.

In a large saute pan, heat the olive oil and saute the garlic, shallots, pepper, potato, mushrooms until the vegetables are almost cooked. Add the edamame, soy sauce, hot sauce and stir. Turn the heat off and add the oats. Taste the mixture and add salt only if needed.

Let the mixture cool for about 15 minutes. Then form into 4 patties. Cover individually in plastic wrap and freeze for at least 1 hour or until ready to use.

In a saute pan, add some olive oil and cook the patties for 2-3 minutes per side until golden brown.

Serving:

Enjoy the patty with some lettuce and mayo on a ciabatta roll or bun.

Notes:
* You can substitute edamame for any beans of choice such as kidney beans, white beans or chick peas.
** Oats can be substituted with other binders such as corn, rice flour or bread crumbs. You can even add some cooked leftover rice.

Wednesday, November 24, 2010

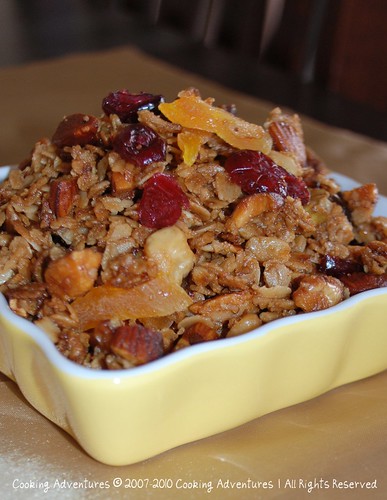
Why do I make my own granola?

Homemade Granola

Because.......if I were to box my homemade granola, the ingredient label would read: Organic old fashioned oats, sunflower seeds, walnuts, pistachios, almonds, brown sugar, honey, vanilla extract, canola oil, cranberries, dates, apricots.

Any similar factory produced granola would have the following ingredients: Oats, sugar, blueberries, almonds, xanthum gum, locust bean gum, carrageenan, guar gum, dextrose, alpha tocopherol acetate, niacinamide, Vitamin A palmitate, natural and artificial flavors, caramel color, BHT.

Period.

Crunchy Homemade Granola:
Makes about 6-7 cups

Ingredients:
3 cups rolled oats
2 cups combined nuts and seeds of choice*
1/3 cup brown sugar
1/2 cup vegetable oil
1/2 cup honey
1 TBS vanilla extract
1 cup mixed dried fruit**
Pinch of salt

Method:

Mix the oats, nuts, seeds, brown sugar and salt in a large mixing bowl.

Combine the oil, honey and vanilla extract in another bowl. Pour over the oat mixture and combine with dry hands to coat thoroughly.

Bake at 325 deg F for 30-40 minutes. Toss a couple of times during the baking process to ensure even browning.

Cool completely and then add the dried fruits. Store in an airtight container in a cool place for up to 1 -2 months.

Serving:

Serve about 1/2 cup of granola with milk or yogurt. Top with fruits and/or berries.

Notes:
*I used a combination of 3/4 cup chopped almonds, 1/4 cup chopped walnuts, 1/4 cup chopped pistachios, 3/4 cup raw sunflower seeds.
**I used 1/2 cup sweetened cranberries, 1/4 cup chopped apricots, 1/4 cup chopped pitted dates.

Monday, October 25, 2010

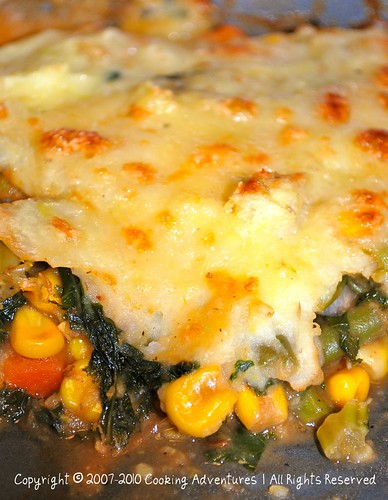
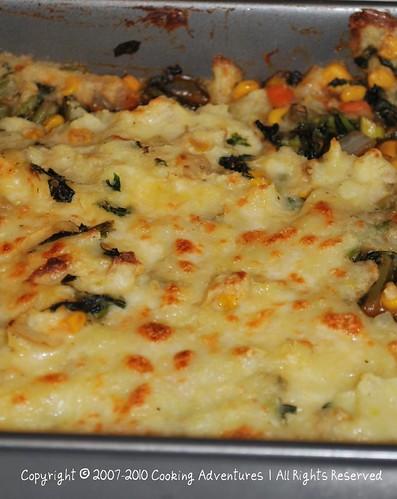
Vegetarian Shepherd's Pie

Vegetarian Shepherd's Pie

While spring notions cool breezes & colorful blooms, summer reminds beaches & berries, fall cues halloween & pumpkins, winter sparks snow and comfort foods!

Although we are still enjoying some warm days, the nights are getting pretty cold. We have been indulging in some delicious and easy comfort foods such as casseroles, mac n cheese, hot soups & sammies on these chilly evenings. To me comfort foods are foods that drive the dullness and boredom away and bring on some motivation and coziness!

This shepherd's pie is one such recipe which gives warmth from within and helps enjoy the cold winter evenings. Unlike the traditional shepherd's pie which has beef as its main ingredient, you will find tons of healthy vegetables in this recipe. The cumin and coriander powder gives this dish a slight Indian twist while kale is the secret ingredient which gives it a 'wow' effect!

Vegetarian Shepherd's Pie

Vegetarian Shepherd's Pie

Ingredients:

2-3 TBS olive oil
1/2 tsp cumin coriander powder
1 1/2 cups of mixed frozen vegetables (I used corn, peas, beans and carrots)
1 cup frozen corn
1 cup asparagus, cut in 1 inch sticks
2 cups of kale, chopped
2-3 cloves of garlic, grated
1/4 tsp nutmeg, grated
2 TBS tomato puree
1-2 TBS soy sauce
2 TBS all purpose flour
2 medium potatoes, cubed
1/4 cup whole milk
1/2 cup gouda cheese, grated
1/4 cup whole milk mozzarella, grated
Salt & Pepper

Method:

In a medium sized sauce pan bring water and the potatoes to a boil with the lid on. Remove the lid when the water comes to a boil and cook until the potatoes are tender. Turn the heat off, drain the water and mash the potatoes. Add 1/4 cup grated gouda cheese, milk, salt & pepper and mix well. This is the topping for the pie.

Heat olive oil in a sauce pan, add the cumin coriander powder and saute the mixed vegetables, corn & asparagus for about 5-10 minutes. Add the kale and saute until the leaves begin to wilt. Add the garlic, nutmeg, tomato puree and soy sauce and mix well. Add the flour and cook for about 2 minutes, mixing well. Turn the heat off.

Spray with cooking oil, a 8X8 baking dish or casserole dish. Pour the vegetable mix in the dish. Top with the mashed potatoes. Spread the remaining cheese on top.

Broil until the cheese has melted and browned, about 2-3 minutes.

Serving:

Serve hot with garlic bread.


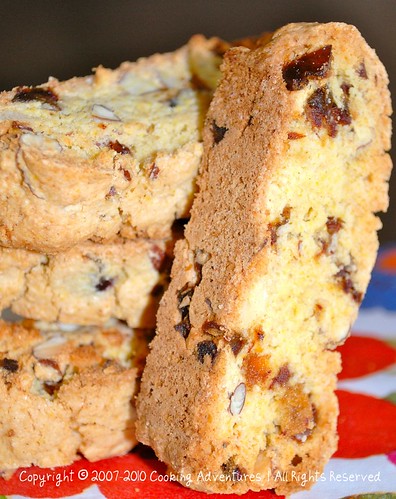
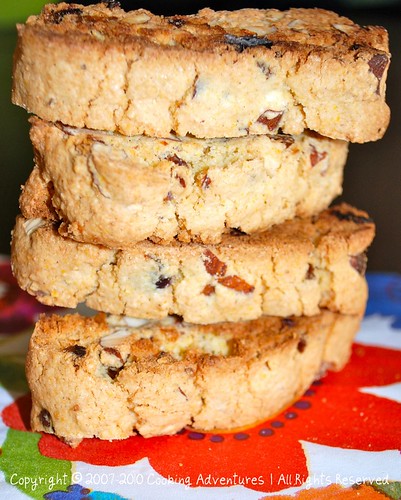
Date & Almond Cornmeal Biscotti

Date & Almond Cornmeal Biscotti

My exposure to biscotti had been limited to a large jar that we picked at our bulk food stores during the holiday season. I loved them as they were individually wrapped and I could choose from a variety of flavors. I never thought about them beyond buying that jar every year and gobbling down a few with my weekend coffee.

Then one day, I ate an almond biscotti at some Italian coffee shop. Flawless biscotti! It was divine! The taste was pure and the crunch was supreme sounding. Soon I found myself digging for the ultimate biscotti recipes. I tried several recipes but could not get close to the accuracy I had in mind.

Finally I landed upon this date and almond cornmeal biscotti in a Martha Stewart book. The recipe gave me the perfection I wanted and the ease I am always looking for while baking! The taste is subtle, the almonds give it the perfect crunch and the dates add to the sweetness. Also, I found the batch size more manageable in home ovens.

Date & Almond Cornmeal Biscotti

Date & Almond Cornmeal Biscotti
Adapted from Martha Stewart
Yields about 16 to 18 biscotti

Ingredients:

1/2 cup plus 2 TBS all purpose flour
1/2 cup plus 2 TBS yellow cornmeal
1/2 tsp baking powder
Pinch of salt
3 TBS unsalted butter, at room temperature
1/2 cup sugar
1 large egg
1 TBS vanilla extract
1/2 cup chopped pitted dates
1/2 cup chopped almond

Method:

Line a baking sheet with parchment paper. Place the rack in the center of the oven and preheat the oven to 350 deg F.

Combine the flour, cornmeal, baking powder and salt in a bowl, mix with a whisk or fork and set aside.

With an electric mixer, cream the butter until smooth. Add the sugar and mix until light and fluffy. Beat in the egg until well combined. Add the vanilla extract and beat again.

Now add the flour mixture all at once, and beat on a low speed until just combined.

Add the dates and almond and mix in with a spatula or fork.

Transfer the dough on to the prepared baking sheet and with wet hands pat the dough to form a log shape of about 13-14 by 3-4 inch size. Bake for about 30 minutes or until the log is lightly browned, firm to touch and slightly cracked on top.

Remove from oven and let cool on the baking sheet for 15-20 minutes. Transfer the log to the cutting board leaving parchment on the sheet. Cut the log crosswise using a serrated knife in to 1/2 inch thick pieces. Place cut side down on the baking sheet. Bake for about 15-16 minutes until just beginning to brown rotating sheet halfway through. Remove from oven and let cool on the baking sheet.

Store the cooled biscotti in an airtight container for up to 3 weeks.

Serving:

Perfect for dunking in your coffee, tea or even wine!

Note:

Recipe can be easily doubled.

Try with a combination of macadamia nuts and apricots, cranberries & pistachios, white & dark chocolate, cashews and raisins!

Sunday, October 24, 2010

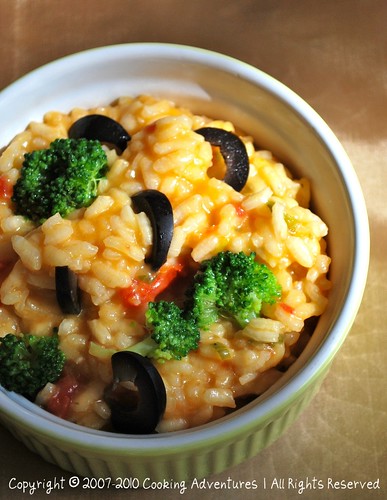
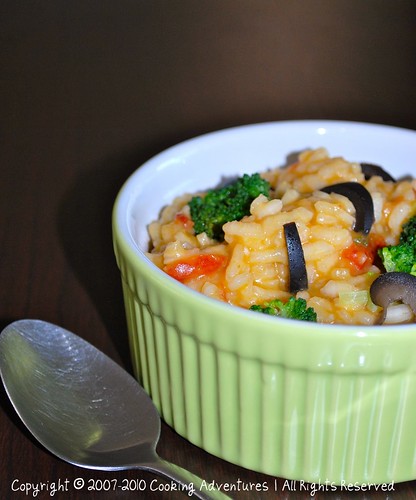
Pumpkin & Vegetable Risotto

Pumpkin & Vegetable Risotto

Fall, my favorite season of all! My heart skips a beat when I realize that this may be my last experience of this gorgeous season. Next year we are headed back to our home country where the only season that exists is "sweat"! Literally. Although the thought that we will be close to family and childhood friends ignites a whole different spark within us, I just cannot grab enough of fall to take back with us!

Seven years back when I first moved to the United States, fall or autumn, just meant the approaching winter. It took me a few years to stop, look around and appreciate what impact a change of season can create on a human mind and its functioning. It was after this realization that I started waiting for fall to arrive! The cool breeze in the air, leaves changing their colors from green to yellow, orange, red and more, the smell of pumpkin spice lattes at coffee shops, the halloween decor, pumpkin carvings and freshly baked pumpkin breads and pies.......hummmm......sounds like we will have to cross the ocean every year just to catch some of this excitement!

I am trying to capture and perfect some lip smacking comfort foods to take back home with us! That way fall would only be a kitchen away. We can then close our eyes, sit back and virtually imagine "Fall" while finishing our bowl of this yummy pumpkin and vegetable risotto!

Pumpkin & Vegetable Risotto

Pumpkin & Vegetable Risotto
Serves 2

Ingredients:

2 cloves of garlic, finely minced
4 scallions, chopped (white & green parts)
2 TBS unsalted butter
1 cup arborio rice
2 TBS sun dried tomatoes, chopped
2 TBS pitted black olives, sliced
1/2 cup broccoli
1/2 cup pumpkin puree
2 TBS parmesan cheese, freshly grated
4 cups water, plus more if needed
Salt & Pepper

Method:

Bring 4 cups of water to a boil. Add salt and cook the broccoli for 2-3 minutes. Remove broccoli and reserve the water.

Melt 1 TBS butter in a medium sized saucepan. Add the rice and saute for a minute until the rice is completely coated with the butter. Add the garlic and scallions and saute for 2 minutes.

Now add 2 cups of reserved water, increase the heat to medium and stir frequently. Cook until al dente.

Add the pumpkin puree, sun dried tomatoes, olives and mix well. Gradually add the rest of the water, a little at a time and stir frequently.

Finish by adding the cheese & broccoli.

Serving:

Serve hot with more parmesan cheese if needed.

Note: For a bolder pumpkin taste, add up to 1 cup pumpkin puree and/or omit the cheese & broccoli.


Saturday, April 10, 2010

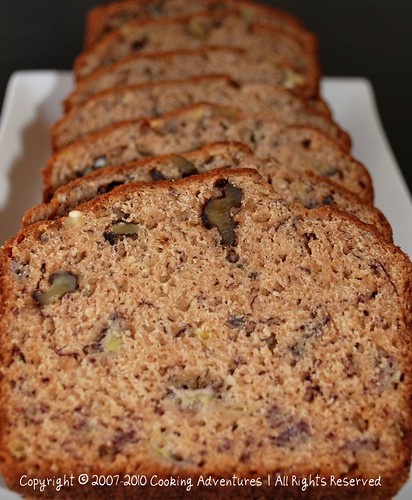
Whole Wheat Banana Walnut Bread

Banana Nut Bread (01) By Poonam Phatak

I am not a big fan of store bought baked goods. Most of the times, the ingredients in them sound more like some factory chemicals than anything edible. But because both Pratik and I are baked food junkies, not buying such ready-made cakes and desserts simply means creating them in our own kitchen. This is no doubt the best way to know exactly what goes in to the food that we eat!

Moreover, now that Myra has started demanding a piece of everything she sees on our plates, I knew it was time to start making healthier food with whole-grains and low-fat ingredients. While I found it relatively easy to incorporate nutritive options for her lunch and dinner, making baked snacks was where it was a little more challenging. While I am sure there are plenty of healthful options and recipes out there, my first option is always to tweak my tried and tested recipes in order to cut down the sugar and the butter, replace the regular non-nutritious flour with a higher food value alternative.

This whole wheat banana walnut bread is a result of one such tweaking experiment. The bread baked perfectly to give the desired texture and moistness. The walnuts provided a nice crunch in the background. But what really gives a kick is the sweet aroma from the bananas that fills the house while the bread is being baked. It teases you right from when those bananas ripen perfectly to be used in the bread, to watching the baked bread cool in the pan. But I can assure you, the end result if absolutely worth the wait!

Banana Nut Bread (02) By Poonam Phatak

Whole Wheat Banana Walnut Bread
Makes 1 loaf (about 10 slices)

Ingredients:

4 tbs unsalted butter, melted
1 cup sugar
1/2 cup unsweetened apple sauce
1 extra large egg, room temperature
1 tsp vanilla extract
1 tsp baking soda
1 cup all purpose flour
1 cup whole wheat flour
2 cups of banana, mashed (approximately 3 large bananas)
2/3 cup walnuts, toasted & roughly chopped (pecans can be substituted for walnuts)
Pinch of salt

Method:

Preheat oven to 350 deg F. Melt the butter in a microwave safe bowl. Dip a pastry brush in the melted butter and grease a 9x5x3 inch loaf pan & flour it.

Sift the flours, baking soda and salt in a bowl.

Add the sugar, apple sauce and vanilla extract to the melted butter and whisk until well mixed. Add the egg and whisk until well combined. Now add the bananas, flour mixture and walnuts one by one and mix just until all the ingredients are incorporated. It is important at this stage to not over mix the batter as this will result in a rubbery end product.

Pour the batter in the prepared loaf pan and bake for about 45 minutes or until the top is golden brown and a toothpick inserted in the center comes out clean. Cover the loaf pan with a foil tent if the top starts to turn dark before the bread has completed baking.

Let the bread cool in the pan before cutting. Remove on a cutting board and cut slices of desired thickness.

This bread tastes even better the next day with the aroma of the banana completely infusing the bread and giving it the desired body and moistness.

Serving:

Serve as a healthy light afternoon snack or have a slice with your hot coffee for breakfast. Munch on this at a picnic or neatly wrap a slice in a plastic wrap and eat your snack on the go!

Storing:


Cover in plastic wrap or air tight containers at room temperature for about 2 days or in the refrigerator for about 4-5 days.

Thursday, April 1, 2010

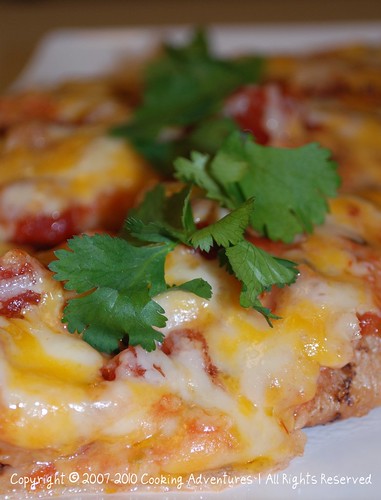
Pratik's Vegetarian Enchiladas

Vegetarian Enchiladas

Wow! I cannot believe that Myra is already 10 months old. Now that was fast...wasn't I pregnant until last week?? Hmm...

In these past months, we have had our share of easy and tough days but never have we had a dull day. Thanks to the abundant activities we have around here in Albuquerque. Weekdays are full of musical activity classes, mom n baby yoga, toy library time and a few play dates. We are indeed having a ball. These activities are well designed and are definitely helping Myra grow into an affectionate, social and caring individual.

I feel good about being at home to give her the most deserved attention. There is a lot of work to do but with the amount of help and support that Pratik offers, even a regular day turns out to be very special. Like last Friday, Pratik got back home from work and surprised me with these flavorful enchiladas loaded with tons of healthy vegetables and decked up with a spicy salsa. Pratik's vegetarian enchiladas did a great job of taking the edge off from the weekly routine.

These enchiladas have five plus points.
Plus Point No.1 ...they are made of whole wheat tortillas.
Plus Point No.2 ...they are loaded with vegetables.
Plus Point No.3...they are a nice change from the regular bean and cheese version.
Plus Point No.4 ...they be easily made for two, four or a crowd alike.
Plus Point No.5 ...they come and go off the table like a breeze!

Vegetarian Enchiladas

Pratik's Vegetarian Enchiladas

Serves 2 (as a complete meal)

Ingredients:

4 medium sized whole wheat tortillas
1 red bell pepper, cubed
1 zucchini, cubed
1 red onion, cubed
1 1/2 tsp cumin-coriander powder
1/4 cup pepper jack cheese, grated
1/4 cup sharp cheddar cheese, grated
1 cup spicy salsa, any good store bought variety
Salt & Pepper
Olive oil

Method:

Drizzle some olive oil in a non stick skillet. Turn the heat to medium high. Once the skillet is hot, drop the vegetables and saute until they are tender and start to caramelize. Add the cumin- coriander powder, salt & pepper and cook for another minute. Turn the heat off.

Pre-heat the oven to 350 deg F. Coat the bottom of an 8X8 baking pan with some olive oil. Arrange the four tortillas on the kitchen counter and coat the top side with some salsa. Stuff the tortillas with the vegetable and some sprinkling of cheese. Roll and arrange in the baking pan with the seam side down. Cover the tortillas with the remaining salsa and top with the rest of the cheese. Bake in the pre-heated oven for about 15 minutes until the cheese is bubbly.

Serving:


Remove from the oven and serve immediately. Garnish with cilantro and sour cream.

Monday, March 22, 2010

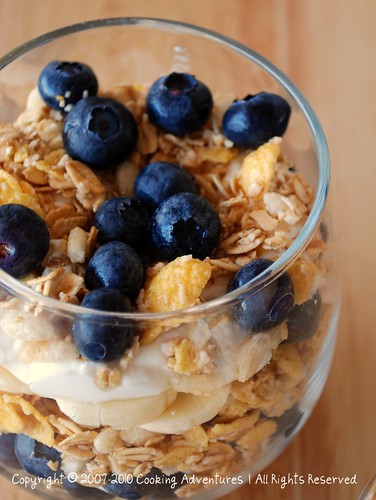
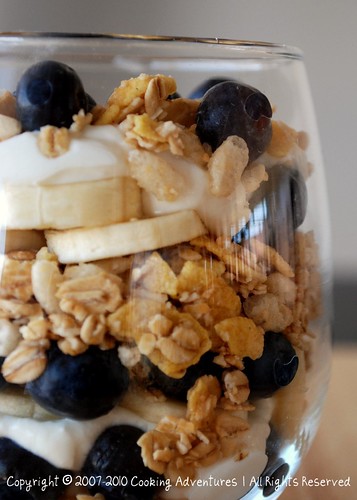
Blueberry & Banana Parfait

Blueberry & Banana Parfait

Breakfast is undoubtedly my favorite meal of the day. You would be surprised at how a big balanced breakfast can fuel your body to sustain the pressures of your daily routine. No matter how much you travel or how stressful your job is, a healthy breakfast is your password to a bright, energetic and happy day. In today's fast paced life, I believe it is the need of every family to watch what they eat for breakfast although they may not be able to make this meal their family meal.

Lately, we have been skipping breakfasts for one reason or the other, starting our day with a heavy dose of caffeine and eating heavy in the evenings. As a result, we get grumpy during the day, overeat in the evenings & feel fatigued and bloated the following morning.

This blueberry and banana parfait did a marvellous job of breaking this vicious cycle. It gave us something incredibly delicious to indulge in as we started our day. This balanced whole meal has the capacity to keep your body fueled for a busy morning. You get your carbs, calcium & protein as well as your berries & fruit in a single delightful bowl. This was our ultimate solution to ensuring that we ate our 'breakfast like a king'.

Blueberry & Banana Parfait

Blueberry & Banana Parfait

Serves 2

Ingredients:

1 large banana, thinly sliced
6 oz packet of blueberries, washed
1 cup granola of choice (I used 7 grain granola)
2 cups plain yogurt
4 TBS sugar

Method:

Mix the sugar and yogurt in a bowl. Take two glass cups or parfait bowls. Arrange the granola, fruit, yogurt & berries in alternate layers. You can create as many or as little layers as you like depending on the size of your parfait bowls.

Serving:

Serve immediately at room temperature or chill for 15 -20 minutes before serving. Cover & store in the fridge if preparing in advance. This can be prepared a day in advance.

Notes:

1. Replace the fruits & berries with what you have at hand.
2. You can substitute the plain yogurt with some flavored yogurt or try Greek yogurt for some extra thickness.
3. Add any nuts of your choice for some added crunch.
4. Use maple syrup or agave nectar as a natural sweetener in place of sugar.

Enjoy!

Tuesday, March 9, 2010

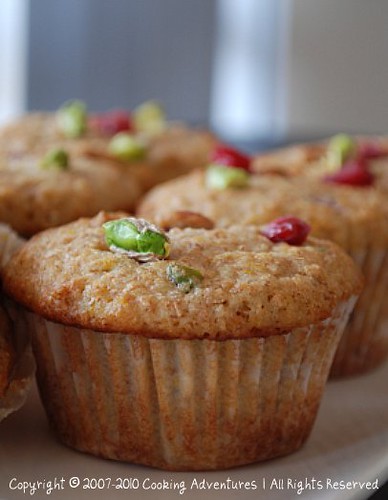
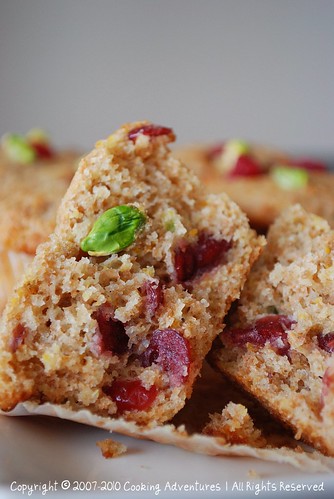
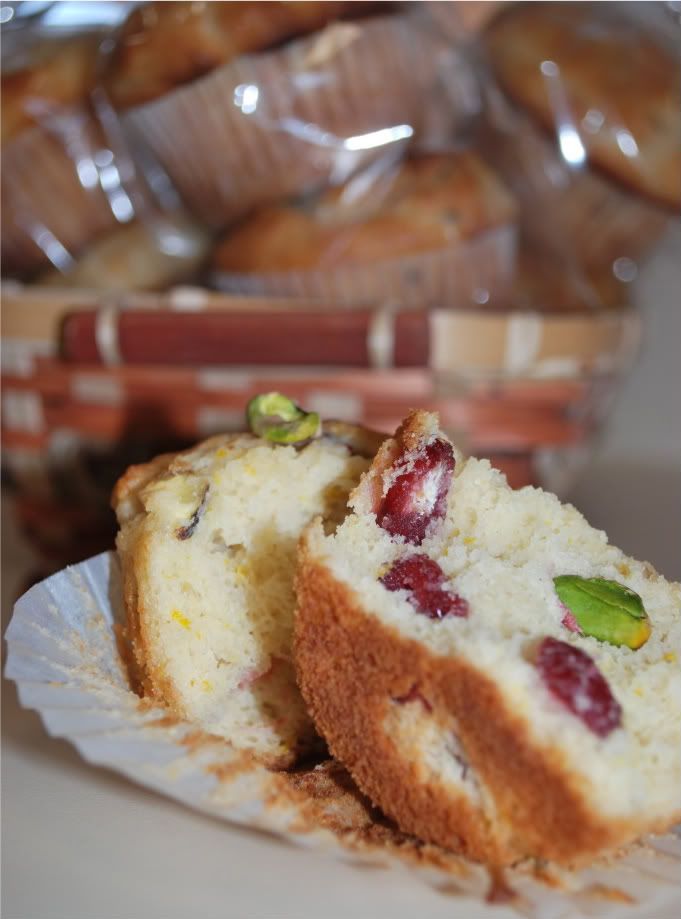
Cranberry & Pistachio Bran Muffins with Orange Zest

Cranberry Pistacchio Bran Muffins with Orange Zest

I know, I know...Christmas is still a long way away....you folks are probably wondering what these bright red and green colors are doing here at this time of the year? Here's what... I had stumbled upon some high quality pistachios and dried cranberries while grocery shopping one weekend in February. I had to buy them, but first I had to think of a recipe I would use them in. That wasn't difficult at all and the result was these moist, delicious and nutty muffins. I shared them with some of my friends, some of whom actually made them at home. I got rave reviews and all of them told me how delighted they were to bake them. I was ecstatic!

With that verdict I set off with my whisk and those rich quality ingredients to try a newer, healthier version of the original muffins. This time by substituting some of the all purpose flour with bran. Yeah! And it was a success! The bran gave a wonderful, nutty texture to these muffins which complimented the sweetness of the cranberries. Pistachios, which are my all time favorite, provide the perfect crunch along with some rich buttery goodness.

I will still be playing around with this recipe to incorporate more whole grain flour, reducing the butter, changing the baking temperature to get an appealing golden brown crust. But for now here is the recipe to these gorgeous healthier muffins.

Cranberry & Pistacchio Bran Muffins with Orange Zest (02) Poonam Phatak

Cranberry & Pistachio Bran Muffins with Orange Zest

Makes 12 standard sized muffins

Ingredients:

Dry Ingredients-
1 cup all purpose flour, sifted
3/4 cup wheat bran
1 tbs baking powder
3/4 cup cranberries, sweetened
1/3 cup pistachios, unsalted & unroasted
Pinch of salt

Wet Ingredients-
2/3 cup whole milk, room temperature
1 stick unsalted butter (1/2 cup), melted
1 large egg, room temperature
1 tsp vanilla extract
1/4 cup apple sauce
3/4 cup granulated white sugar
1 tbs orange zest

Method:

Preheat the oven to 400 deg F. Line a standard muffin tin with muffin cups.

Mix all the dry ingredients in a bowl and set aside.

Mix all the wet ingredients in a 2 cup measuring bowl and whisk until well combined (Mixing in a measuring bowl just makes it easy to pour the wet ingredients in to the dry ingredients. You can mix the wet ingredients in any bowl).

Pour the wet ingredients over the dry ingredients. Using a rubber spatula fold the ingredients using minimal strokes. Do not over mix.

Fill each muffin cup with 1/4 cup batter.

Bake for about 13-15 minutes until the tops are golden brown. Allow them to cool in the pan for about 15 minutes and then transfer to the cooling racks.

Serving:

Enjoy with a cup of hot coffee for breakfast or as a snack.

Thursday, February 25, 2010

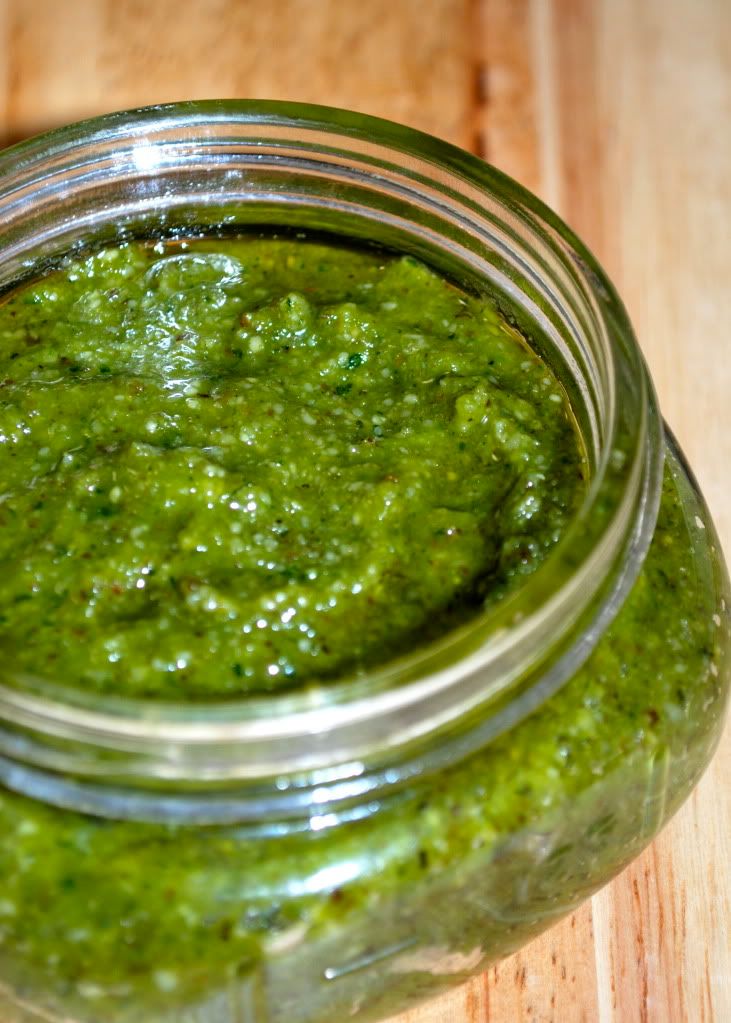
Basil Pesto


When it comes to hosting parties, we like to keep it simple these days. With Myra being so little, things may not go exactly the way we plan them. But that absolutely does not keep us from not having friends over for dinner at home.

This past weekend we hosted a fun pizza party at our house. While the kitchen was left in the hands of the men, we girls enjoyed chit chatting over a few drinks. The kids of course had a gala time with Myra crawling all over the place.

I'll write another post showcasing all the pizzas we prepared. For now, let me share this simple basil pesto recipe which we used as a topping for one of the pizzas.

I love pestos, and particularly this one for its versatility. It can be used as a spread on crostinis, tossed in with pastas, used as a marinade for grilling and even as a substitute for the regular tomato sauce on pizzas. The possibilities are endless. The only secret in making a good pesto, I think, is using fresh ingredients.


Basil Pesto
Yields about 1 1/2 cups

Ingredients:


2 cups fresh basil, packed
2 cloves of garlic
1/2 cup freshly grated Parmesan cheese
1/2 cup walnuts
1/2 cup good olive oil
Salt & Pepper

Method:

Add the basil, garlic, walnuts and salt and pepper in to the food processor. Process until the mixture looks minced, but not completely pureed. Then with the processor running, add the olive oil in a steady stream and process until the entire mixture is pureed. Add the cheese and process again for a minute.

You can use the pesto right away. It can also be stored for up to 6 weeks in air tight containers with a thin layer of olive oil on the top. This prevents the pesto from coming in contact with air and keeps the pesto fresh and green looking.

Serving:

Serve the pesto as a spread on crostinis, use it as a sauce for pizzas or as a marinade for grilling. Toss it on pastas or use it as a dressing for salads. You won't be wrong!

Note: This recipe yields a slightly thicker pesto. Use extra olive oil if you prefer a thinner consistency.

Tuesday, February 16, 2010

Cranberry & Pistachio Muffins with Orange zest


Boy, did I ever think it would be so much fun to play with kids? Not until this past Sunday! Myra had her first play date at home with some of our friends' kids that day. It wasn't anything formally arranged. A few of us friends had got together at a community function. As it ended and everyone was waving their final good byes, I just happened to ask if the kids wanted to come home to play with Myra. With approval from their respective parents, the kids, ranging in age from three to ten, headed home with us.

And the next thing we knew, Myra was having the time of her life. Our eight month old was laughing her heart out watching a seven year old do cart wheels. The kids enjoyed crawling in and out from the see through tunnel, playing peek a boo with Myra (absolutely her favorite!), reading her favorite stories and singing some classic rhymes for her. The added fun factor was that they were allowed to hold Myra, pick her up, sit her on their laps and drive her in her mini car. And while Myra took her afternoon nap, all the kids enjoyed making sugar cookies and watching their favorite movie. We did not want the fun to end.

We went to bed happy and dreamed of all the fun things we did during the evening. We woke up the next morning to these scrumptious cranberry pistachio muffins and coffee. The sweetness of the cranberries and the nuttiness from the pistachios go along very well. The orange zest gives the perfect tang in every bite of this muffin. Additionally they are easy to make and can be put together in no time.

Cranberry & Pistachio Muffins with Orange Zest

Makes 12 standard sized muffins

Ingredients:

Dry Ingredients-
1 3/4 cups all purpose flour
1 tbs baking powder
3/4 cup cranberries, sweetened
1/3 cup pistachios, unsalted & unroasted
Pinch of salt

Wet Ingredients-
2/3 cup whole milk, room temperature
1 stick unsalted butter (1/2 cup), melted
1 large egg, room temperature
1 tsp vanilla extract
1/4 cup apple sauce
3/4 cup granulated white sugar
1 tbs orange zest

Method:

Preheat the oven to 400 deg F. Line a standard muffin tin with muffin cups.

Mix all the dry ingredients in a bowl and set aside.

Mix all the wet ingredients in a 2 cup measuring bowl and whisk until well combined (Mixing in a measuring bowl just makes it easy to pour the wet ingredients in to the dry ingredients. You can mix the wet ingredients in any bowl).

Pour the wet ingredients over the dry ingredients. Using a rubber spatula fold the ingredients using minimal strokes. Do not over mix.

Using an ice cream scoop fill the muffin cups about 1/2 to 3/4 way up leaving room for the muffins to rise as they bake.

Bake for about 13-15 minutes until the tops are golden brown. Allow them to cool in the pan for about 15 minutes and then transfer to the cooling racks.

Serving:

Enjoy with a cup of hot coffee for breakfast or as a snack.

Saturday, January 23, 2010

Grilled Vegetables with Cilantro Sauce


It has been over a year now since I published my last post. Phew! what a year? Nothing in our life so far has been more exciting, exhilarating and exhausting, all at the same time. I call it the triple "E" effect. We are now blessed with a little baby girl, Myra. A lot of other changes have occured as well. First, I quit my job to be mom in chief (!), Pratik started working on his new post-doctoral position, my brother-in-law got married, my sister got married, we moved to a new city and to top it all, we made some exciting friends in our new town....families we truly like spending time with. What more could we ask for?

So now, as Myra is peacefully napping, I decided to get down to writing some serious stuff. You see, we have been cooking some great food inspite of the never ending everyday list of things to do with a now eight month old. However, coming up with something, taking good photographs and then blogging about it does require a lot of time. Right now things seem to have fallen back in shape and it looks like we are almost starting to follow some sort of schedule. But then again, this might not be my come back post. I will be blogging sporadically, Myra being my priority. Of course, I will brag about my new role as a mom in the posts to follow. Right now, I have exactly one hour before my little girl wakes up to play her 100th peek-a-boo adventure.

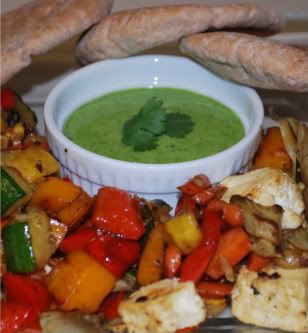
I hope you enjoy these delicious grilled vegetables and paneer as much as we did. The cilantro sauce adds freshness to the vegetables and paneer giving them a creamy texture. It is full of flavors and will warm your taste buds on a cold winter day. We ate ours with petite pita pockets but you can let your imagination run wild on how to serve them.

Grilled Vegetables and Paneer with Fresh Cilantro Sauce

Ingredients:

1 red bell pepper, cubed
1 yellow bell pepper, cubed
1 zucchini, cubed
1 yellow squash, cubed
1 carrot, cubed
1/2 cup of paneer, cubed
1/3 cup of butternut squash, peeled and cubed
Olive oil
Salt
Pepper

For the sauce-

1 cup of fresh cilantro, chopped
2 tbs olive oil
1 tbs plain yogurt
2-3 tbs mayonnaise
1 tsp maple syrup
2 tsp lemon juice
Salt & Pepper


Method:

Get your indoor grill pan screaming hot. Drizzle with some good olive oil to coat the bottom of the pan completely.

Grill all the vegetables evenly on all sides, tossing and turning every couple of minutes. Season with salt and pepper. Remove them from the grill pan onto a platter and then grill the paneer cubes until they turn golden brown. Season the paneer with salt and remove onto the platter.

Cilantro sauce:

Put all the ingredients for the sauce in a blender and blend together to make a fine paste.

Serving:

Serve on a big platter with the cilantro sauce kept in a bowl at the center. Alternately, toss the sauce with the grilled veggies and paneer and serve in a bowl. Goes well with charred pita pockets, tossed into some cooked pasta or on a bed of cooked wild rice or even as a side itself.

This recipe is packed with the fiber and vitamins from the vegetables, protein from the paneer, carbs from the pita bread or pasta. The cilantro in the sauce is a great digestive.

All in all, this recipe is quick, good and healthy for you!