Wednesday, September 3, 2008

Lemon & Ginger Risotto


For us, weekday lunches are mostly quick meals made at home, and then boxed to take along to work. There are several reasons for this. First, I love to cook. Second, I am a big home-made food fan. Third, I like to know exactly what goes into everything that I eat and last but not the least, I need to write this food blog and come up with new recipes to keep up with you guys!

While home-made lunch boxes are great, nothing compares to a lunch of piping hot cup of soup right off the stove, or a freshly assembled salad or even a great bake to just dig in. And when you have the luxury of making these on a Friday afternoon, as I have had for the past few weeks, the experience matches only to that of eating a fabulous dessert before a meal. And that is the real spice which takes it to the next level!

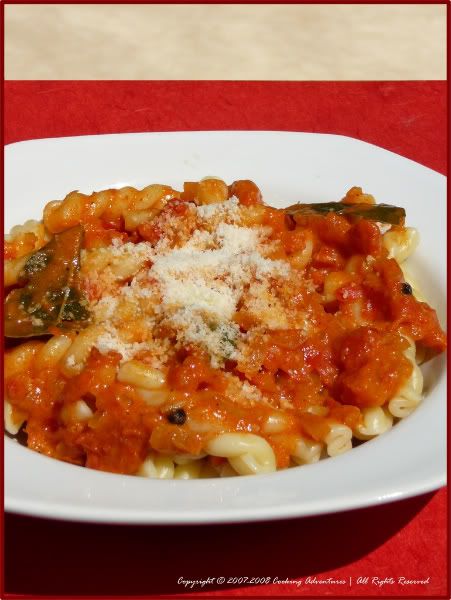
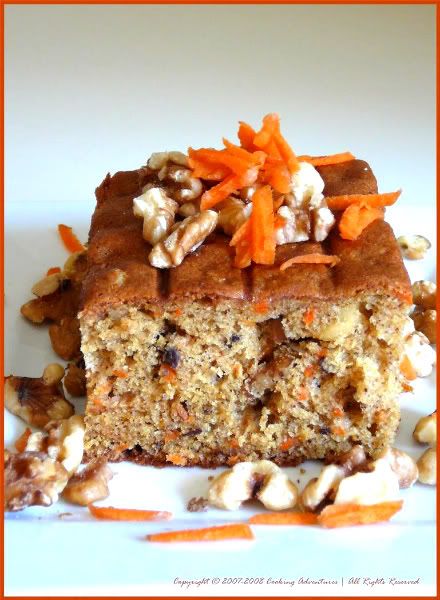
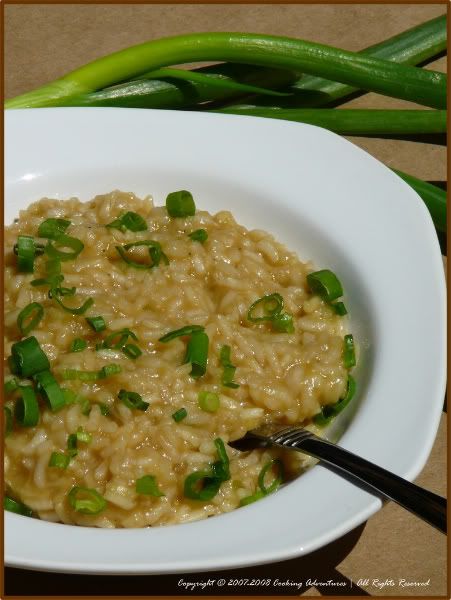
My past Friday afternoon was exactly like this, and I made a delicious risotto to compliment the rains and the chill outside. Lemon and ginger added the perfect flavor combination for the muggy afternoon. A home-made chocolate cake followed, and then a tight afternoon nap on the couch made the Friday perfect! I wish all Fridays were like this!

Soak yourself into the flavors....

Ingredients:

Serves 2
1/2 lemon, juice
Zest of 1 lemon
1 tbs freshly grated ginger
1 bunch scallions, cut in rings
3/4 cup short grained rice (Do not wash the rice)
3-4 cups of vegetable stock or whey (You may need more depending on the rice that you use)
2 tbs butter
Salt & pepper

Method:

In a sauce pan, melt the butter and then add the white part of the scallions, lemon zest and ginger. Saute for about 30 seconds.

Now add the rice. Mix well until well coated. Then add 11/2 cups of stock or whey. Mix well and let it cook on a slow simmer. Continue adding the rest of the stock in 1/2 cups until the rice is cooked but still has a bite. Add salt & pepper. Mix the green parts of the scallion and lemon juice a few minutes before serving, leaving some for garnish.

Serving:

Serve hot in warm bowls. Garnish with the remaining green parts of the scallions. You can also top with any sharp cheese of choice but do not let the cheese over power the flavor of the lemon and ginger.

Sunday, August 31, 2008

Beetroots in Coconut Milk


My life would have been so much easier if chocolate chip cookies had been beneficial to our health compared to say, slices of beetroot. Don't get me wrong here. I absolutely enjoy every bit of my fun filled life..........until it comes to making Pratik eat beetroot. Yep, his dislike for them matches only to my dislike for crows! I have come up with so many beetroot recipes to date that my brain has given up on ideas. None of them have worked so far!

And that is exactly when you folks came to help me. I want to thank each one of you who left me some gorgeous recipes and links for making use of the abundant beetroots in our home. I also searched online and some have even made beetroot ice-cream! In fact, Alexa has made a wonderful beetroot mousse filled in chocolate cups! Now that is certainly commendable and I am sure it tasted great! But I think it is reasonable to conclude that you folks also have to come up with something eye catching to make your family eat beetroots?

In whatever form, I am just happy when I see the recipe work. This side dish of beetroots in coconut milk is not only healthy but packed with abundant flavor from fennel seeds. And as I had expected it worked well on my husband! Hurray!

Ingredients:

4 medium cooked beetroots, cubed
1 yellow onion, finely chopped
1 garlic clove, grated
1 tbs olive oil
1 tsp turmeric
1 tsp ground fennel
2 tsp curry powder
1/2 cup whey or vegetable stock
1/2 cups coconut milk
1-2 tbs lemon juice
Cilantro for garnish
Salt

Method:

Heat the olive oil in a saute pan. Add the onions and garlic, ground fennel, turmeric & curry powder. Saute for 2-3 minutes.

Add the cubed beetroots and mix well. Add whey or vegetable stock and simmer until reduced by half. Add the coconut milk and simmer again for 5-7 minutes.

Add salt and lemon juice and mix well.

Serving:

Serve warm as a side. Garnish with cilantro.

I am sending this recipe to Sunita for her wonderful "Think spice" event. I hope the fennel spices up your event anniversary menu.

Saturday, August 23, 2008

Pasta with Fresh Tomato Cream Sauce


What do you do when you are left with a dozen tomatoes after using them in all kinds of soups, salads, sandwiches and more?

# 1: You vow to stay under control the next time you see these delicious red beauties at the market!

# 2: You create this extraordinary tomato cream sauce to please your family and almost make them forget that all they have been eating for the entire week has been tomatoes in various forms! Yeah, you have to make this sauce to believe that I am not exaggerating here. It is seriously a knock-out of a kind! Topped on any pasta or gnocchi, it offers a satisfying and easy to prepare meal, especially when you are super-tired. Our pasta tasted extra special because we ate this while watching Micheal Phelps take that 8th gold. And boy, is that man for real? What a win!

In ecstasy over this Phelps phenomenon, we helped ourselves to a few extra servings on this pasta! The freshness of the tomatoes added with the smoothness of the cream and two very dear spices, bay leaf and whole peppercorn, take this sauce to a whole new level!

And now before we go to the recipe, please tell me, what do you do when you are left with a dozen beetroots after using them in soups, salads, sandwiches and more? I know #1-- don't lose control when you see them at the market the next time. But for now, please help me with # 2 How about a spicy pink sauce for another pasta night?

Ingredients:

Serves 4
Pasta of your choice
2 tbs olive oil
2 tbs unsalted butter
2 medium yellow onions, finely chopped
3 cloves of garlic, finely chopped
2 1/2 cups finely chopped tomatoes
4 bay leaves
10 whole black peppercorns
3/4 tsp salt
1/4 tsp pepper
1 cup water, whey or vegetable stock plus more if needed
2 tbs tomato paste
1/3 cup heavy cream
Parmesan cheese for topping

Method:

Heat the olive oil and butter in a medium sauce pan. Add the bay leaves and peppercorn and lightly roast for a minute. Add the garlic and onions and saute for about 2 minutes.

Now add the tomatoes and cook until the tomatoes are soft. Add the tomato paste, water or whey or vegetable stock, salt and pepper and stir well. Simmer for about 3-4 minutes. Add the cream and simmer for another minute or two.

Cook the pasta as per the instructions on the box.

Serving:

Mix the sauce well with the cooked pasta. Top with some grated or powdered Parmesan cheese. I prefer to leave the bay leaves in the sauce but you can pull them out before serving.

I am sending this pasta over to my friend, Ruth for her weekly Presto Pasta Night event! Ruth is a wonderful lady and her event has given me the perfect pasta recipes for numerous dinners! I hope you enjoy this one, Ruth!


Monday, August 18, 2008

Blueberry Buttermilk (Yeah Buttermilk!) Panna Cotta

Whoever came up with the idea of letting the common man onto a farm to pick fruits must have been a genius. Pratik and I had been fascinated by the idea of picking berries on a farm for a while, but had never actually got a chance to try it out. So when we made a trip to Canada this summer to visit my aunt, we were delighted when she asked whether we wanted to go strawberry picking. In that excitement, I remember letting out a brief shriek, confusing my aunt about whether I was really excited about the idea or whether it sounded so disgusting that I was in some sort of panic mode. It was hysterical. Anyway, things were sorted out and we jetted off to one of the farms close to her home.

It was an awesome experience. We could pick what we wanted, eat what we picked and to top that, take home a basket full. All for just 5 bucks. Eating all the strawberries picked fresh off the farm on a beautiful summer day! What more could one want? The tartness of these fruits, along with their sweetness is what makes these summer fruits extra special!

Back from the trip, my memory still fresh from the lovely strawberry picking experience, I went looking for strawberries at our farmers market. I wanted to try out a strawberry panna cotta. As luck would have it, they didn't have any! However, the bluberries there looked fabulous. I picked some up with the idea that I would now make a blueberry panna cotta instead.

Like most of you know, panna cotta translates to 'cooked cream'. Given our calorie filled vacation though, I wanted to create a lighter, healthier version. So I experimented with using buttermilk instead of the cream. We absolutely loved the result and will definitely make this again!

As a completely random side, are any of you watching the basketball games at the Olympics? Chris Kaman, playing for Germany, summarized Team USA's performance absolutely perfectly after Germany got routed by them yesterday: "Nobody is going to beat them. No way, it's just not going to happen". Gotta love those guys! More on that later.

Here we go with the recipe:

Ingredients:

2 cups low fat buttermilk
1 cup milk (I used 2% fat but whole milk will be the best)
1/4 cup plus 2 tbs sugar
1 tbs vanilla essence
1 tbs unflavored gelatin
2 tbs cold water
1/4 cup of fresh blueberries
1 tbs sugar for the blueberry puree
Mint sprigs (optional)
Few extra blueberries for topping (optional)

Method:

Grease 8 small ramekins with some oil.

Process the blueberries and 1 tbs of sugar in a food processor until smooth. If desired, strain this puree through a fine sieve.

Soak the gelatin in cold water.

Combine the first four ingredients in a small saucepan. Bring it to a slow simmer stirring continuously. Add the soaked gelatin in this mixture while whisking steadily. Add the blueberry puree and mix well.

Pour into the greased ramekins. Allow to cool outside for 10 minutes. Keep in the refrigerator overnight.

Serving:

To unmold, dip the ramekins in hot water for about 10 seconds and carefully flip on to a plate. Alternately, run a knife along the edges of the ramekins and then flip on to a plate. Top with mint sprigs and more blueberries if desired.

Note:

It is very important to stir the buttermilk continuously while simmering to prevent it from curdling. I have used buttermilk to keep the dessert healthy. You could use a combination of buttermilk, half & half; heavy cream (1 cup each).

Health Benefits:

Buttermilk is lower in fat and helps digestion. For more information click here.

Blueberries (or for that matter, berries in general) are packed with antioxidants, help in improving vision, protect against cancer, help protect the brain & promote gastrointestinal health. For more information click here.

Wednesday, August 13, 2008

Cauliflower & Potato Gratin


The taste of the cauliflower gratin served at my friend’s house when we were in France last year is still tantalizing my tongue. When I took the first bite, I was in heaven. The vegetable combined with the cheese sauce just melted into my mouth. Needless to say, the cauliflower was picked fresh from their own garden and the cheese was authentic French. An absolutely satisfying and savory experience. Truly one of a kind! It was, I thought, the best way to convert the otherwise bland cauliflower into a hearty meal.

In the previous few posts, I have been raving about my trips to the farmers market. I don't want to go on and on about it, but I really think that fresh cauliflower right from the garden as in our friends case or a farmers market, as in my case, can totally change the taste of this gratin. Believe me, I've tried the same thing with frozen stuff and it isn't even half as good. I invite you all to try out this amazing cauliflower and potato gratin, created with the finest cauliflower head, unblemished baking potatoes and fresh cheese bought at our farm market.


Dig in!


Ingredients:

1/4 cauliflower head, cut
1 medium or 3/4 large baking potato
2 bay leaves
1tbs lemon juice
Salt and pepper

For the cheese sauce-
1 tbs butter
1 small shallot, finely cut
1 clove of garlic, grated
1 tbs all purpose flour
2 cups milk
1tbs heavy cream
1/4 cup mix shredded cheese such as sharp cheddar, pepper jack, etc.
1-2 hot and sweet peppers
4 tbs powdered Parmesan cheese

Method:

1. In a pot of boiling water, add some salt, lemon juice and the bay leaves. Stir and add the cut cauliflower. Cook partially covered for about 10 minutes or until the cauliflower is tender. Drain the water and let the cauliflower cool. Add some pepper. Then remove the bay leaves.

2. Cut the baking potato in small cubes. In a microwave dish, place the cubed potatoes with 2 tbs of water. Cover partially and microwave for 4 minutes. Remove, let cool, then add some salt and pepper.

3. In a sauce pan, heat some butter and saute the shallots, garlic and hot and sweet peppers. Add the flour and cook for a minute. Slowly add the milk, whisking gently as you add the milk. Add the heavy cream and continue to whisk slowly. The sauce will gradually start to thicken. Now add the powdered Parmesan cheese, salt and pepper and stir. Add half of the grated mixed cheese and stir.

4. Pre heat the oven to 350deg F.

5. Grease 4 ramekins with some butter or oil. Divide the cauliflower equally in the ramekins. Layer the mixed cheese equally and evenly in the ramekins. Layer the potatoes. Now add the cheese sauce until the tops are covered. Sprinkle top with some more Parmesan cheese, if desired. Alternately you can create the same layers in an oven proof casserole dish.

6. Bake at 350deg F for 45 minutes to one hour. Remove from the oven and let cool for 1-2 minutes before serving.

Serving:

Serve hot. Sprinkle some pepper on top and garnish with chopped cilantro if desired.

Saturday, August 9, 2008

The Perfect Carrot Cake!


Every weekend I buy huge bounties of berries, fruits and vegetables at the farmers market. During my last trip, I was totally in the mood to make a carrot cake, and so some gorgeous juicy carrots were what I picked up first. Then came everything else. But it is not just the produce section that gets my attention. The fresh jams, pickles, dressings, sauces, pies and cookies also keep me lingering at the market for a long time. While browsing through these sections, I also picked up a jar of spiced apple sauce the same day.

When I got back home, I began my search for the perfect carrot cake recipe. After reading tons of recipes here and there, I decided to follow the trusted source for baking. Not only did I get what I was looking for, the recipe also allowed me to use the spiced apple sauce. For my cake though, I completely omitted the cream cheese frosting.

Thank you Stephanie for teaching me the perfect carrot cake!

The ingredients and the recipe can be found here.

Cool Summer Salad

Today was a perfect Saturday morning. The air was cool outside and the morning sun was shining bright. After a good night's sleep, I walked in the backyard with a cup of tea and with no to-do tasks in my mind. Such mornings are very rare, when I am not thinking of the next thing to do while finishing the one in hand. One cup of tea was followed by another, and yet there was no rush!

This flawless start followed through for the rest of the day. I almost felt like I had forgotten what it feels like to take things so easy. To top that, Pratik asked if I could make one of his favorite beetroot salads for lunch. How perfect, I thought.

On went the apron, out came the grater and 15 minutes later, my man, who otherwise goes berserk over candy and chocolate, was eating this fantastic beetroot salad.

Beets add the vibrance, peanuts & yogurt add the creaminess and lettuce and carrots add the crunchiness to this cool summer salad.

Ingredients:

For the salad-
1 medium beetroot, shredded
1 medium carrot, shredded
1/2 lettuce head, cut into 4 quarters
2 tbs lemon juice

For the peanut dressing-
2-3 tbs lightly salted peanuts
1/4 cup plain yogurt
1/2 tsp red chilli power
Salt

Method:

1. Lightly mix the shredded beetroot, carrot, 1 tbs of lemon juice and some salt.
2. In a coffee grinder, grind the peanuts until they are finely powdered.
3. Mix the powdered peanuts, yogurt & red chilli powder with some salt. This is the dressing for the salad.

Serving:

Arrange the four quarters of the lettuce on a serving plate & drizzle 1tbs lemon juice. Add a dollop of the peanut dressing over the lettuce cups. Spoon the shredded beetroot and carrot over the dressing. Add more dressing on the top and garnish with some chopped cilantro, if desired.

Monday, July 28, 2008

Roasted Corn & Vegetable Soup

It was a beautiful evening. I felt like walking and walking and walking and walking. Pratik and I recently found out about this trail, less than a mile from home! For approximately 3 miles it runs through a dense wooded patch and the rest continues through open corn fields. On one side is a small fishing pond which is equally calm to sit at. This past weekend, we walked hand in hand through these tranquil woods and corn fields. This was probably one of the most relaxing weekend walks we have had in a long time.

Coming back from the walk, we just decided to spend the rest of the evening in our backyard, grilling some sweet corn. And dinner simply turned into a delicious feast, yet another quick barbecue between the two of us. The sweet corn on the cob, chunky burgers topped with sharp cheddar cheese bought fresh from the farm market that morning, and our favorite freshly baked bread were the stars of the evening. The added zing was this roasted corn and vegetable soup which I had attempted the previous evening. I have to admit that this was also one of the recipes which just turned out superb inspite of not following any fixed proportions. Just a handful of this and a fistful of that worked really well!

Ingredients:
2 sweet corn
3-4 different varieties of sweet and hot pepper
1 inch hot paprika
2 medium carrots
2-3 different varieties of zucchini
3/4 pint cherry tomatoes
1-2 cups of water or vegetable stock
2 cloves of garlic
1tbs chopped cilantro

Method:
1. Arrange the tomatoes closely on skewers. Brush with some olive oil.
2. Cut the vegetables lengthwise in to strips of medium thickness. Brush with some olive oil.
3. Arrange all the vegetables, tomatoes and corn on the grill. Roast on all sides until grill marks appear.
4. Remove from the grill and let cool completely. Remove the kernels of corn.
5. Blend through a food processor with some garlic & paparika. Leave some kernels of corn as is if you wish and add them while you simmer the soup.
6. Add water up to desired consistency to this mixture and simmer for 15-20 minutes in a soup pot. Add salt and pepper as per taste.

Serving:
Serve hot with some crusty Parmesan cheese bread or any baguette toasted with cheese. Sprinkle some chopped cilantro on top.

Note: If you desire, you can roast the garlic too. Just keep a close eye if you decide to do this because nothing as bad as the taste of burnt garlic.

Sunday, July 27, 2008

Saffron Rice Pudding


It's been a blissful summer so far. Not only did we get to spend some memorable time with our family but Pratik and I were also able to complete several of the ever lingering things on the "to do" list. And it feels great to be back with more time to cook and blog!!

My parents and my in-laws visited us in Hershey during the months of May and June. We spent most of our time away, vacationing in Texas, California and Canada. I must say, it was a one-of-a-kind vacation, not only because we all had fun, but also because every single one of us was craving for this time together. And oh yes, these days were not just fun filled, but also calorie filled. Tons of tasty food cooked in "ghee" at home, greasy pizzas and creamy pastas while on vacation, topped with zero exercise. Yeah, I neither cared nor dared to stand on the weighing scale.

Besides all these good things happening this summer, I am now also working some flexible hours at work. I get to take off early on Fridays and that means more time to try new recipes on Friday afternoons. This creamy saffron rice pudding was an outcome of my first such Friday. It is nutty and creamy and above all it is original! The saffron gives this dessert a rich color and perfect taste. An exquisite recipe to leave an everlasting impression on your guests.

Ingredients:

1/2 cup long grained rice
2 cups of milk
1/4 cup sugar
1/2 tsp saffron threads
1 tbs of milk for soaking the saffron threads
2-3 tbs raisins

Method:

1. Wash the rice with tap water and blanch in boiling water for two minutes. Drain all the water.
2. Add 1 cup of milk to the rice and bring it to a slow simmer. Add the sugar. Continue to add the remaining milk in small proportions just like while making a risotto. Stir the mixture to ensure that the rice does not stick to the bottom of the pan. You can add more milk depending on the desired thickness of the pudding.
3. Warm 1 tbs of hot milk in the microwave and soak the saffron threads. Stir with a spoon until the milk turns to a bright yellow color.
4. Add this to the pudding. Add raisins and stir the pudding.
5. The rice pudding is ready when the grains of rice are cooked completely. I kept the rice very very slightly undercooked to give it a nutty texture.
6. Place the pudding in small ramekins or dessert bowls and bring it to a room temperature. Chill for two hours before serving.

Serve:

Serve chilled (preferably) with some more saffron threads and raisin topping.

Note: Basmati rice will make the most flavorful pudding. But if you want to keep the dollars low, any long grained rice would do just fine.

Sunday, April 20, 2008

Lemon Yogurt Semolina Cake

With the temperatures in the upper 70's and the sun shining bright, it was time to get our grills out and have some friends over for a barbeque. I pulled out a cookbook with some recipes of Greek food to get a few ideas on kebabs for the barbeque party. While I was flipping through the book I stumbled upon this dessert cake. It called for a different ingredient "semolina" in place of our regular "all purpose flour". The picture in the book was so tempting that I had to try it out. It also reminded me of a similar wonderful semolina cake that my Mom bakes at home. I was lost in the past, thinking of the sweet smell of this cake which surrounded the entire house as it baked on a stove top....yeah, stove top. That's how Mom made this cake back then.

What excited me even more was that I had everything that the recipe required in my kitchen! That doesn't happen too often! I considered this as my lucky charm and put my apron on. 40 minutes later, this is what came out of my oven....


Ingredients:

For the Cake-


2 tbs unsalted butter, softened
1/4 cup granulated sugar
1/2 tbs lemon rind
1 egg
1/4 cup fine semolina
1/4 cup ground almonds
1/4 cup black raisins
1/2 tsp baking powder
4 tbs plain yogurt

For the Syrup-

4 tbs sugar
2 tbs lemon juice, fresh
2tbs honey

Method:

1. Cream the sugar, butter and lemon rind with an electric beater until light and fluffy.
2. Crack the egg and beat into this mixture until well incorporated.
3. Lightly fold in the semolina, ground almonds, baking power, raisins and yogurt.
4. Line a 5 inch springform with parchment paper. Pour the mixture in it and bake at 350 deg F oven for 25-30 minutes. The cake is done when a tooth pick inserted at the center comes out clean. The top should turn golden brown.
5. Mix the ingredients for the syrup in a sauce pan. Heat it until the sugar melts but do not boil the mixture.
6. Drizzle the syrup on the cake as soon as it comes out of the oven.
7. Cool the cake completely and cut into triangular pieces. Serves 2-3.

Serving:


What??? Just dig in..


Thursday, April 10, 2008

Vegetable & Corn Chowder


I had been planning on trying this recipe throughout winter. But for some reason or the other, it kept getting pushed for later. Soon it was Spring and I forgot all about this chowder and instead went in for a cold Summer Beetroot Soup. However, the cold weather got back to tease us again. Now was my opportunity to check out this chowder that I had been thinking of all through the winter. So here you go...I hope you enjoy this vegetable corn chowder loaded with healthy fats, starch, fiber and protein.

Ingredients:
1 tbs vegetable oil
1-2 cloves of garlic
1 small red onion, diced
1 large red bell pepper, diced
1 medium potato, diced
1/3 cups broccoli florets
1 cup sweet corn
1/2 cup Sharp Cheddar Cheese, grated
2 1/2 cups milk
1/4 cup heavy cream
1 1/4 cups vegetable stock
2 tbs all purpose flour
2 tbs fresh cilantro, chopped finely
Salt and pepper


Method:

1. Cook the broccoli florets until tender in boiling water with some salt. Remove and keep aside.
2. Heat the oil in a large soup pot and add the garlic. Saute for a minute and then add the onions, potatoes and red bell pepper. Stir for about 5 minutes.
3. Add the flour and cook for about a minute.
4. Stir in the stock and milk and bring it to a boil stirring continuously.
5. Add the sweet corn and simmer for about 15-20 minutes over low heat until all the vegetables get cooked.
6. Add the broccoli florets, heavy cream and cheese.
7. Stir for 2 minutes and season with salt and pepper.

Serving:

Serve in a warm soup bowl with a crusty baguette. Garnish with finely chopped cilantro.


Sunday, March 30, 2008

Ahh....Creme Brulee'

Creme Brulee'! I really believe that this delicious creamy dessert has the power to break many diets. I call it the "calorie bomb". However, if I see this on the menu, then yes, creme brulee is what I order for dessert. I love it so much that if I were eating this in a closed room with nobody around, I would lick the ramekin clean! (Shh.....don't spread this around now )

Until a few months back, it was a restaurant-only dessert for us. But I recently conquered the wide spread fear of making creme brulee at home and was ready to serve it to our friends for a farewell dinner. Creamy, smooth and delicious, this classic French dessert left a lasting impression on their minds!

Try out this in your own kitchen and experience the "wow" effect for yourself....


Ingredients:

1 cup heavy cream
1 cup milk
1/4 cup sugar
1 whole egg
3 egg yolks
1 tbs vanilla extract
Brown sugar

Method:

1. Combine the heavy cream, milk and vanilla extract and bring it to a boil. Cool for about 10 minutes while you prepare the egg mixture.
2. Mix the egg yolks, egg and sugar in a bowl. Beat the mixture with an electric beater just until well incorporated. Do not over beat.
3. Now comes the slightly difficult part. You have to add the hot milk mixture to the eggs without curdling it. Add the milk in a slow and steady stream into the eggs while continuously whisking the egg mixture. Remember that you should not over whisk the eggs as you do not want to add air into the mixture. By slowly adding the milk to the eggs, you will ensure that at any time the temperature of the eggs is almost the same as that of the milk.
4. Strain the mixture through a fine strainer to remove the foam.
5. Divide the mixture into four small ramekins (about 4 ozs each). Pour hot water in a baking dish and set the ramekins such that the water comes half way up the sides. This is a water bath which will ensure even baking.
6. Place in a 325 deg oven for about 25 minutes or until the centers are just wobbly.
7. Remove from the oven and let cool completely on the counter.
8. Cover the ramekins and keep them in the refrigerator overnight.

Servings:

Before serving , sprinkle brown sugar on top and caramamelize the tops with a torch or under the broiler. You have to be very careful if you are caramelizing the tops under the broiler. Set the broiler to 300 deg F. Place the ramekins in a baking dish under the broiler. The caramelization will take only about 10-15 seconds.

Wednesday, March 19, 2008

Summer Beetroot Soup

I remember liking this vibrant root vegetable, beetroot from the day my mom introduced it to me. This luscious red bulb looks very unattractive on the outside. However, once cut open the lively red color will never go unnoticed.

I always ate beetroot in some salad form when I was young. My mom either served it as a raw shredded salad on the side with crushed peanuts and lemon juice or partially cooked and mixed with yogurt, salt and pepper. Either way, it was fantastic!


With an intention to give a tweak to these two favorite recipes, I recently bought these lovely red beetroots from the farmers market. The inspiration for this recipe came from the “Summer Borscht” televised on Ina Garten’s show on Food Network. Whether you like beetroots or not, try this recipe and you will find yourself appreciating the inner beauty of this delicious and nutritive root vegetable.


Ingredients:


2 cups low fat buttermilk
½ cup vegetable broth
¼ cup plain yogurt
1 cup cooked beets, cubed
½ cup cucumbers, cubed
Juice of 1 lemon
Chives
Salt & Pepper


Method:


1. Mix the buttermilk, vegetable broth and yogurt with a whisk.
2. Add the beets, cucumber, salt and pepper and mix well with a spoon.
3. Chill in the refrigerator for at least 3 hours.


Serving:


Just before serving, add the lemon juice in the soup and mix well. Serve in individual soup bowls or cups and garnish with chopped chives.

Saturday, February 9, 2008

Goat Cheese Pizza with Arugula and Mushrooms


It had been a merry evening so far inside The Venetian, Las Vegas. We had walked through the gigantic casino and hotel at the pace of a tortoise, a pace we fail to appreciate during our routine workdays. We peeped inside every shop and read the menu at all restaurants. We strolled everywhere and eventually came to St. Marks Square. There were people singing, dancing, eating and laughing. It was perfect!!!


However, it became a little confusing when we had to pick one of two fascinating restaurants for dinner. The choice was between one headed by Mario Batali and the other by Wolfgang Puck. We checked the menu on both and picked Wolfgang Puck’s. A few minutes later, we watched this lovely goat cheese pizza vanish from the platter, bite by bite. I couldn't wait to get home and try it out. So here you go.....

Oh, and one more thing! Eli Manning, I love you! That was an amazing victory… Kudos!


Ingredients:


1 packet Betty Crocker's Pizza Crust
1 1/2 cups crumbled goat cheese
Handful of arugula leaves
1 cup sliced baby bella mushrooms
Salt, pepper & Olive oil

Method:

1. Prepare the pizza dough as per the instructions on the packet.
2. Brush the top of the prepared pizza base with some olive oil.
3. Spread the arugula, mushrooms and the goat cheese on the top.
4. Drizzle some olive oil, salt and pepper.
5. Bake in the oven as per the instructions on the packet.

Serving:

As you wish!


Sunday, February 3, 2008

Vegetable Pasta Nests with Garlic Cream Sauce


Given the frequency that this blog has been updated the past few days, you pals should be able to guess whats cooking in my kitchen. We have been sticking to the basics and most of the times having some quick fix meals. Blame it on my workload or just the “n” things I get involved in at a time, there’s always something or the other going on.

So the theme “Comfort Foods” for Meeta’s Monthly Mingle comes around at a perfect time for me. Burgers, Mac and Cheese, Pasta or Plain Dal and Rice are the only options on the menu these days. So when our friend Sydney decided to visit us last Friday, I just simply decked up my comfort food for the day and Vegetable Pasta Nests with Garlic Cream Sauce were set on the table! The dinner was loved by all. Here you go….

Ingredients:

For the Pasta

4 Angel Hair Pasta Nests
Some butter to brush the tops of the pasta nests
2 tbs bread crumbs
2 tbs Parmesan cheese, shredded
Olive oil
Salt and pepper

For the Vegetables

1 large red bell pepper, cut in strips
4 portobello mushroom caps, sliced
1 large zucchini
1 large garlic cloves, chopped
Olive oil
Salt and pepper

For the Garlic Cream Sauce

1 tbs butter
1 shallot, chopped
1 large garlic clove, chopped
1 pint half and half
1/2 cup milk
4 tbs Parmesan cheese, shredded
Salt and pepper

Method:

Vegetables

1. Mix all the ingredients for the vegetables and broil on a cookie sheet at 350 deg C.
2. Add the salt only after all the vegetables cook.

Sauce

1. Melt some butter in a sauce pan over medium heat. Add the shallot and garlic and cook for about a minute.
2. Then add half and half and milk and bring to a slow simmer. Allow the sauce to simmer until the mixture starts to get thick.
3. Add the cheese, salt and pepper. Stir the sauce well and remove from the heat.

Pasta

1. Cook the pasta as per the instructions on the box. (I add some salt and olive oil to the water before cooking the pasta.)
2. Place pasta nests on a baking tray. Brush the tops with some butter. Sprinkle some bread crumbs and Parmesan cheese on the top. Place under the broiler at 350 deg C. Keep a close eye on the pasta. Remove from the broiler as soon as the tops turn golden brown.

Serving:

On a dinner plate, place a big spoonful of the garlic cream sauce. Place the pasta nests on the sauce. Top the nests with the vegetables. Pour some more sauce on the top. Top with some parsley or cilantro.

Monday, January 21, 2008

Mango Panna Cotta


There was never a moment while I was away when I didn’t think about you friends, and of course food!! So instead of ranting of how busy I was lately, I just welcome you all to enjoy this oh-so-lovely mango panna cotta, which I have topped with pistachios, almonds and mango pulp!

Needless to say, this is the latest creation out of my kitchen, something that we have been indulging in over the weekend. It was also about time I peeped in to say hi to my friends and fellow bloggers. And what better way than this creamy Italian delicacy?


Ingredients:

1 cup low fat buttermilk,
1 cup half and half
1 cup whipping cream
1 tbs vanilla essence
1/3 cup + 3 tbs sugar
2 tsp gelatin powder
2 tbs cold water
4 tbs mango pulp
A few slivered almonds & pistachios

Method:

1. Grease 8 ramekins and set aside.
2. Soak the gelatin in cold water.
3. In a sauce pan, heat the buttermilk, half and half, whipping cream, sugar, mango pulp and vanilla essence. Bring it to a slow simmer.
3. Remove from the stove and mix the gelatin while whisking this mixture slowly.
4. Pour into individual ramekins and chill for at least 4-5 hours.

Serving:

Carefully run a sharp knife to loosen the edges of the panna cotta. Keep your serving plate on the ramekin and turn it upside down. Tap on the top of the plate. Panna cotta will slip onto your dessert plate. Top with almonds, pistachios and some more mango pulp, if desired.